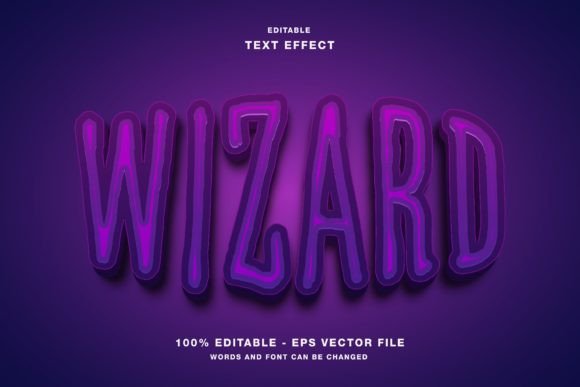
Mastering the Wizard Halloween 3D Editable Text Effect for Professional Design Results
Halloween design projects often suffer from a lack of depth and visual impact, resulting in promotional materials that fail to capture attention in a saturated market. Many creators rely on flat, static typography that blends into the background rather than standing out as a focal point. The Wizard Halloween 3D Editable Text Effect offers a sophisticated solution to this common problem, providing a pre-styled, three-dimensional typographic asset that instantly elevates the aesthetic quality of any project. However, simply downloading a text effect is not enough to guarantee professional results. Understanding how to properly integrate, customize, and export these assets is crucial for maintaining quality across different media platforms.
This resource is specifically designed for Adobe Illustrator, making it a powerful tool for designers who need vector-based scalability. Whether you are creating social media headers for Instagram and Twitter, designing high-resolution flyers for local events, or producing magazine covers, the versatility of this effect lies in its editability. The files are provided in both EPS and JPG formats, ensuring compatibility with various workflows. Yet, many users overlook critical technical details regarding color modes and layer management, which can lead to frustrating revisions and subpar output. By addressing these common pitfalls early, you can streamline your design process and achieve a polished final product.
Understanding the Technical Foundation and Color Modes
One of the most frequent misunderstandings involves the color mode of digital assets. The Wizard Halloween 3D Editable Text Effect is optimized for the RGB color space. This is a vital distinction for designers who may be accustomed to working primarily in CMYK for print production. RGB (Red, Green, Blue) is an additive color model used for screens, including websites, social media platforms, and digital displays. It allows for brighter, more vibrant colors that glow with light, which is particularly effective for Halloween themes involving magic, neon, or supernatural elements.
If you attempt to use this RGB-optimized effect for high-end offset printing without proper conversion, you may experience significant color shifting. Muted purples might turn muddy, and bright greens could lose their luminosity. To avoid this, always check your document settings before beginning your design. If your final output is strictly digital, such as a Facebook post or an email newsletter header, staying in RGB ensures the colors remain true to the original preview. For print materials like posters or event papers, you must carefully convert the colors or adjust them manually after placing the effect to ensure the printed result matches your digital proof. Ignoring this step often leads to costly reprints and dissatisfied clients.
Common Mistakes in Customization and Editing
The primary selling point of this asset is its fully editable nature. You can change the text to suit your specific campaign, whether it is a "Spooky Sale" announcement or a "Haunted House" event title. However, beginners often make the mistake of breaking the underlying structure while editing. Because the effect relies on complex vector paths, gradients, and possibly mesh tools to create the 3D illusion, haphazardly deleting anchor points or ungrouping essential layers can destroy the dimensional look.
A better approach is to use the direct selection tool cautiously and only modify the text content through the appropriate type tool functions provided in the template. Before typing your new headline, examine the existing font choices. The wizard theme typically pairs well with serif or display fonts that have strong vertical strokes. Replacing the placeholder text with a thin, sans-serif font might cause the 3D extrusion to look disproportionate or weak. Always test different font weights to see how they interact with the lighting and shadow effects built into the template. This small adjustment can mean the difference between a professional-looking headline and a distorted graphic.
Optimizing for Different Platforms and Use Cases
Designers often forget that a single asset must perform differently across various mediums. A text effect that looks stunning on a large poster may appear cluttered or illegible when shrunk down for a Twitter profile banner or an Instagram story. When using the Wizard Halloween 3D Editable Text Effect for social media promotions, consider the safe zones and aspect ratios of each platform. On mobile devices, intricate details can get lost. Simplify the surrounding elements and let the 3D text breathe by adding ample negative space around it.
For publication promotions like magazines or flyers, resolution is key. While the EPS file provides infinite scalability, the accompanying JPGs are raster images. Ensure you are using the vector EPS file for any large-format print work to avoid pixelation. If you are working with the JPG for quick web drafts, remember that it cannot be resized up without losing quality. A practical tip is to always keep the original EPS file open in Illustrator while you work, allowing you to make last-minute text changes or color tweaks before exporting the final version for your specific channel.
Evaluating Quality and Usability Before Implementation
Before committing to this text effect for a major client project, it is wise to conduct a quick usability test. Open the included EPS file and attempt to change the text to your longest possible headline. Check if the 3D perspective distorts awkwardly with longer words. Some 3D effects are tuned for short, punchy phrases and may stretch unnaturally when applied to longer sentences. If this happens, you may need to adjust the tracking or scale of individual letters manually to maintain the visual integrity of the effect.
Additionally, verify the layer organization. A well-constructed template will have clearly labeled layers for shadows, highlights, base text, and background elements. If the layers are messy or merged, it will significantly increase your editing time. The Wizard Halloween 3D Editable Text Effect is designed to be user-friendly, but taking a moment to understand the layer hierarchy will save you hours of frustration later. Look for grouped elements that can be toggled on or off, giving you control over the intensity of the 3D pop.
Making the Right Choice for Your Design Workflow
Integrating pre-made text effects into your workflow should enhance efficiency, not complicate it. By choosing a customizable asset like this, you avoid the time-consuming process of building 3D typography from scratch. However, success depends on respecting the technical constraints and leveraging the editable features wisely. Always prioritize clarity and readability, even when using elaborate stylistic effects. Ensure that the contrast between the text and the background remains high enough for easy reading, especially on smaller screens.
Ultimately, the value of the Wizard Halloween 3D Editable Text Effect lies in its balance of artistic flair and practical utility. It allows creators of all skill levels to produce high-impact visuals for Halloween campaigns without needing advanced 3D modeling skills. By paying attention to color modes, font compatibility, and platform-specific requirements, you can avoid common pitfalls and deliver designs that are both visually striking and technically sound. Take the time to explore the included files, experiment with different text variations, and adapt the effect to suit your unique brand voice. This proactive approach ensures that your Halloween promotions stand out for the right reasons, engaging your audience with professional-quality graphics that command attention.